Push Notifications (Firebase)
Enables your users to receive push notifications from your network.
Installation
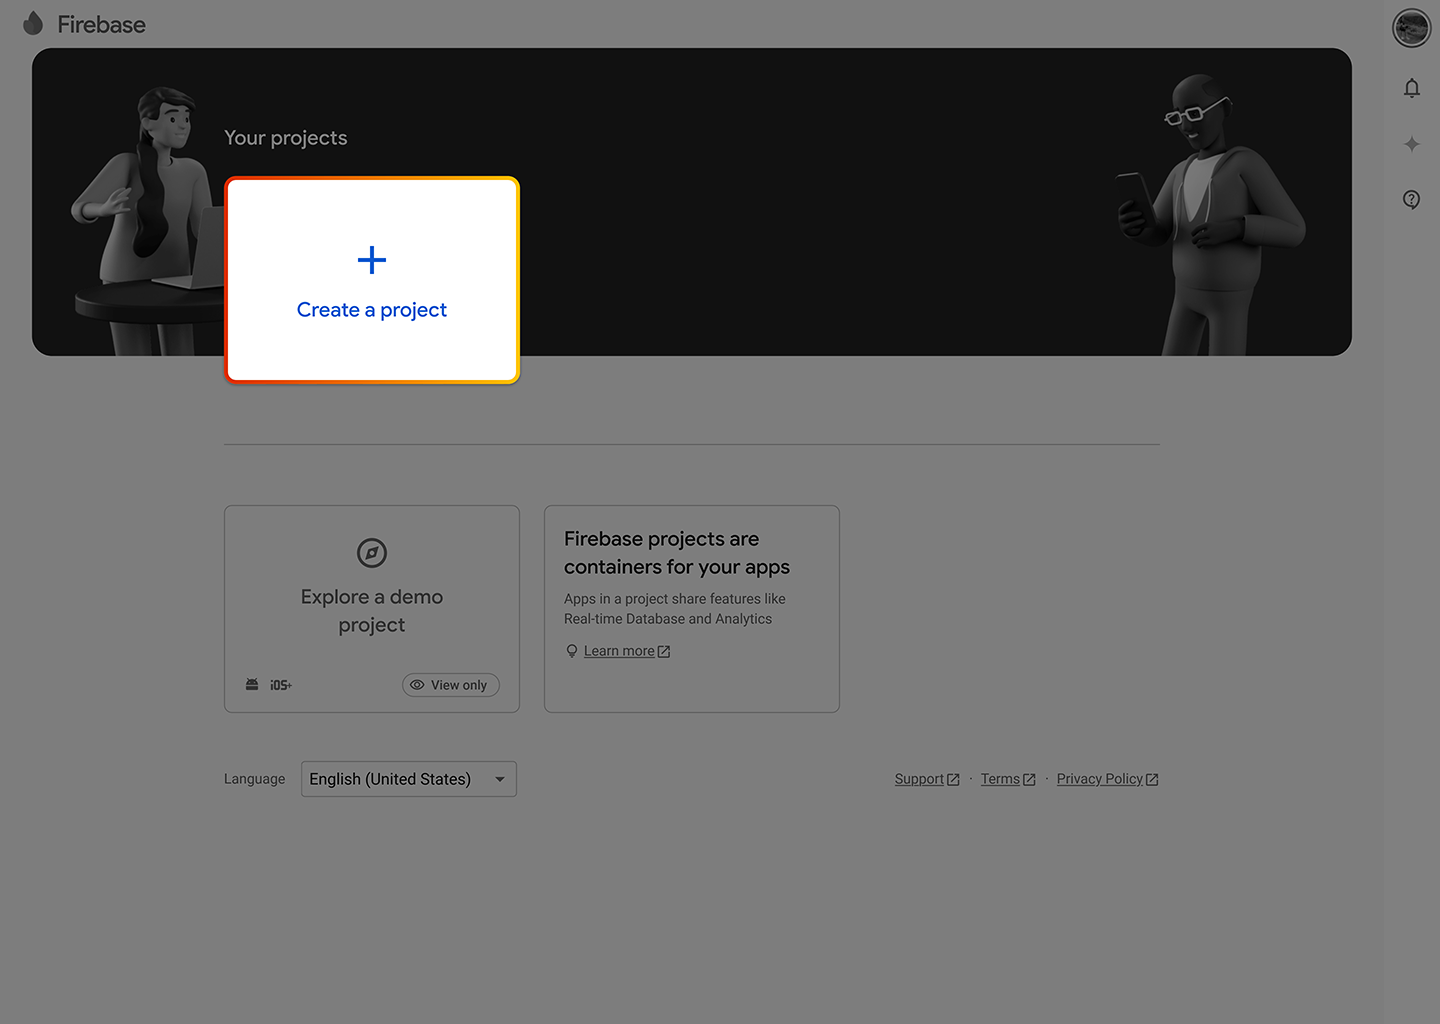
1. Create a Google Firebase account and start a new project.
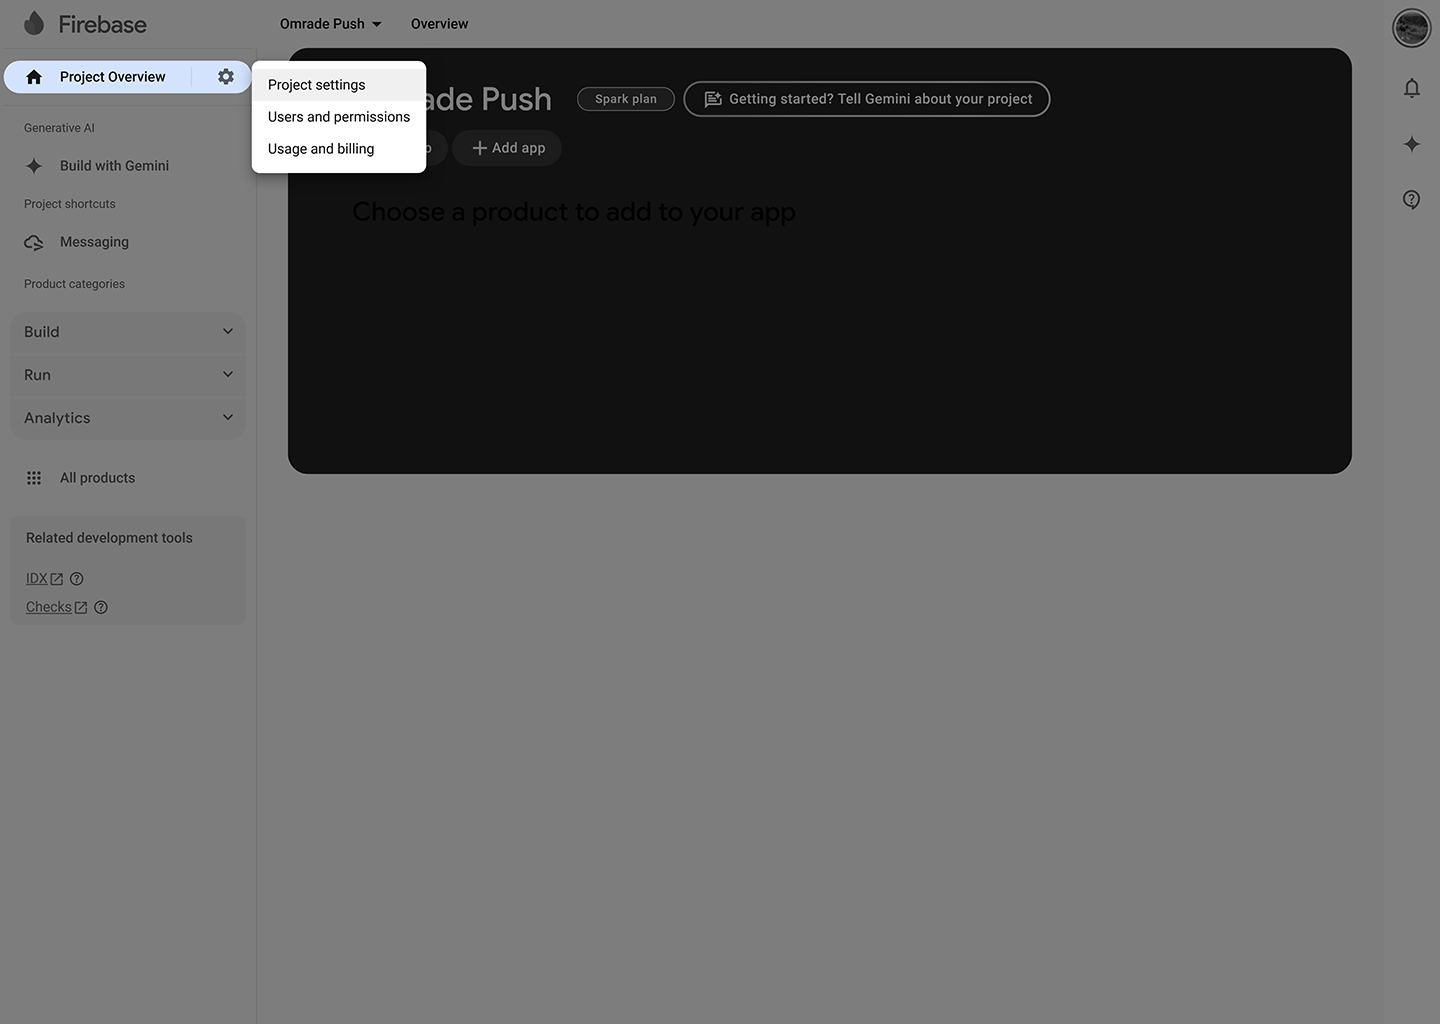
2. Navigate to Project Overview > Project Settings.
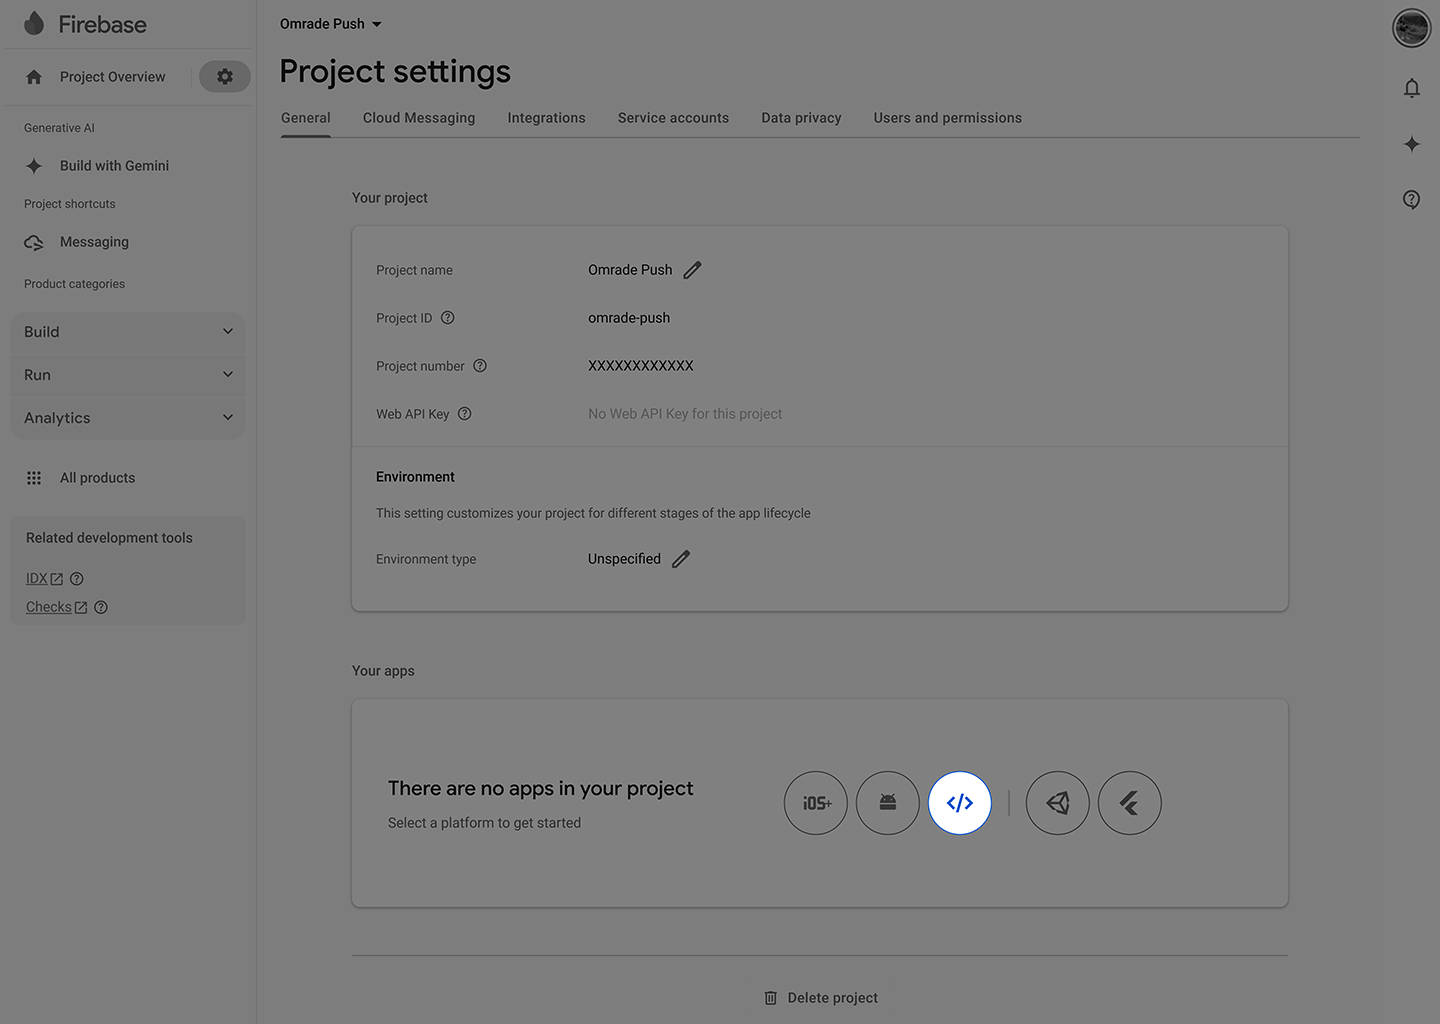
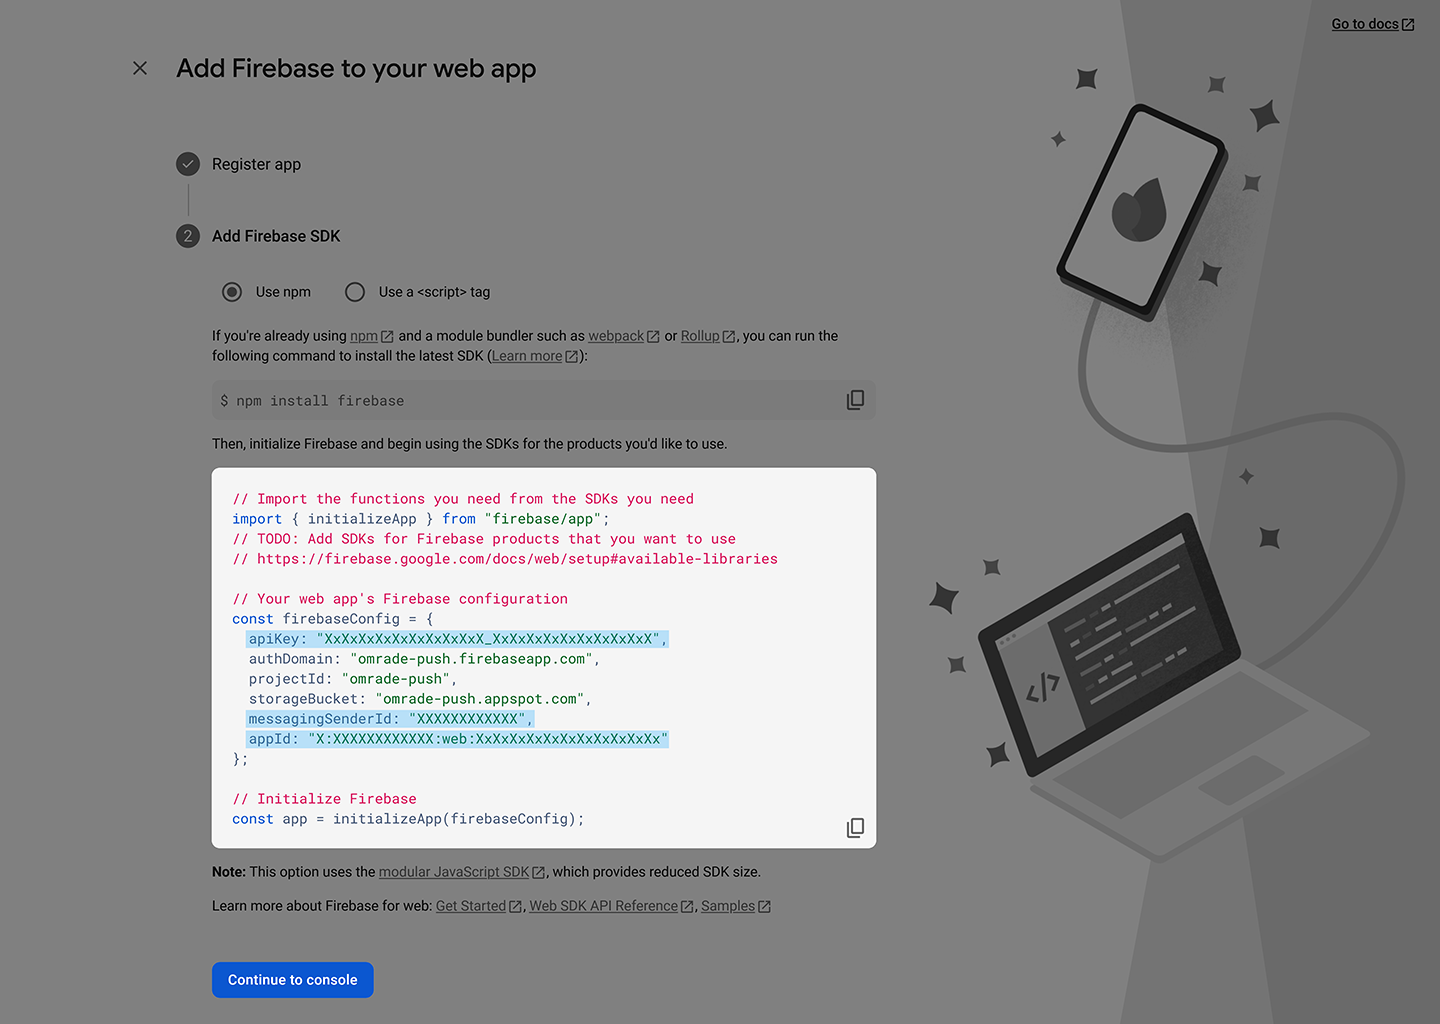
3.1. Under the General tab, select the option to create a Web App.
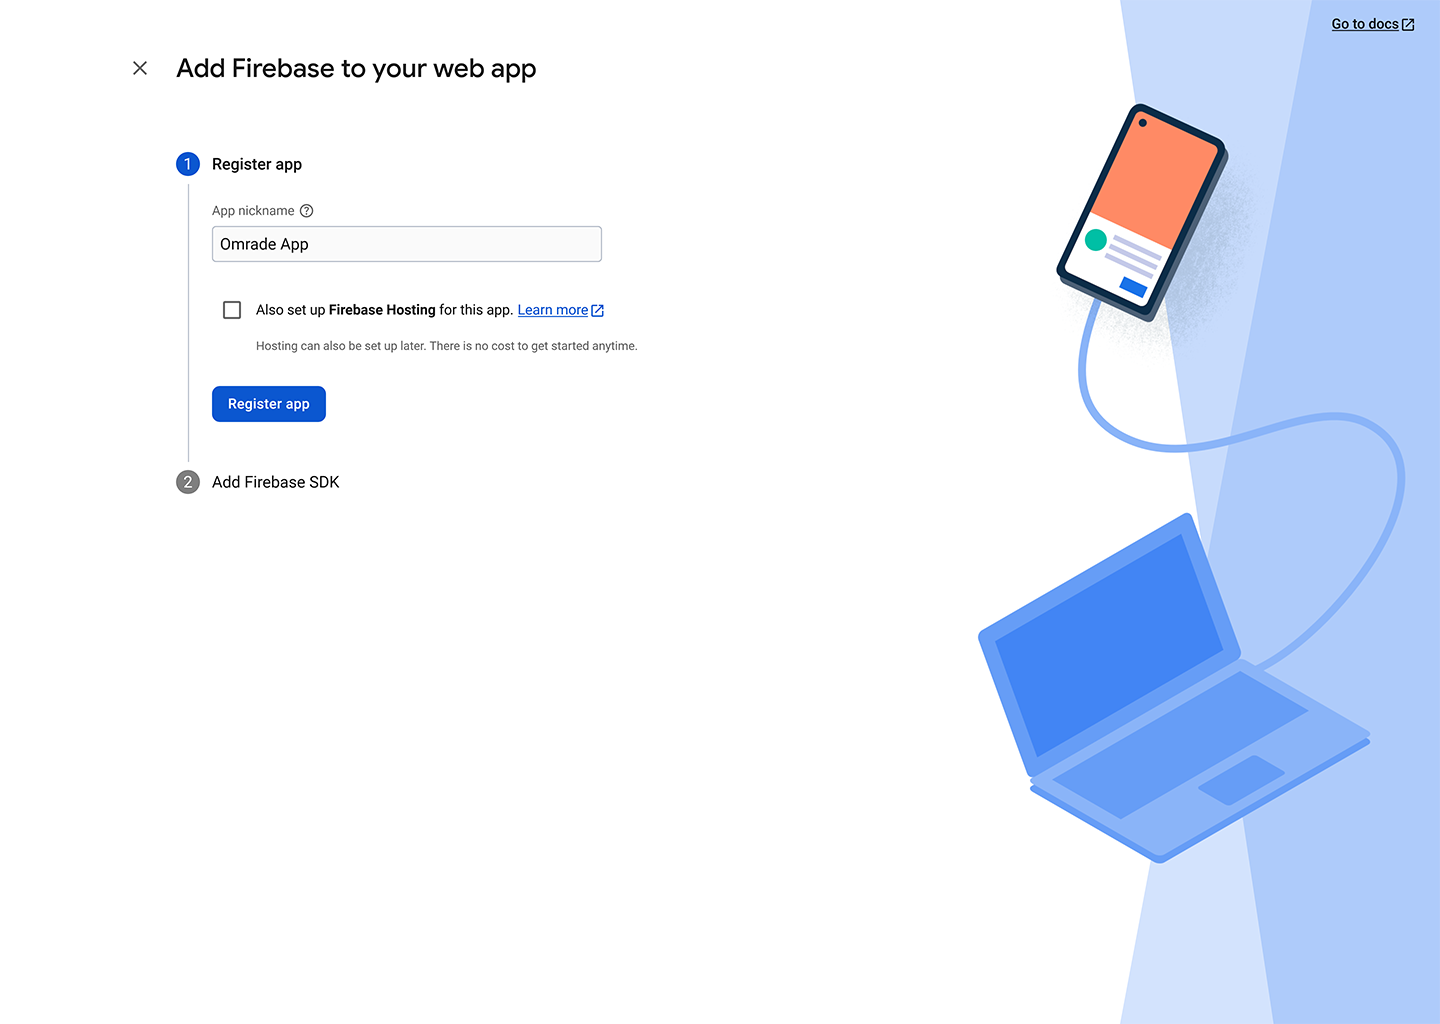
3.2. Name your app and click Register App.
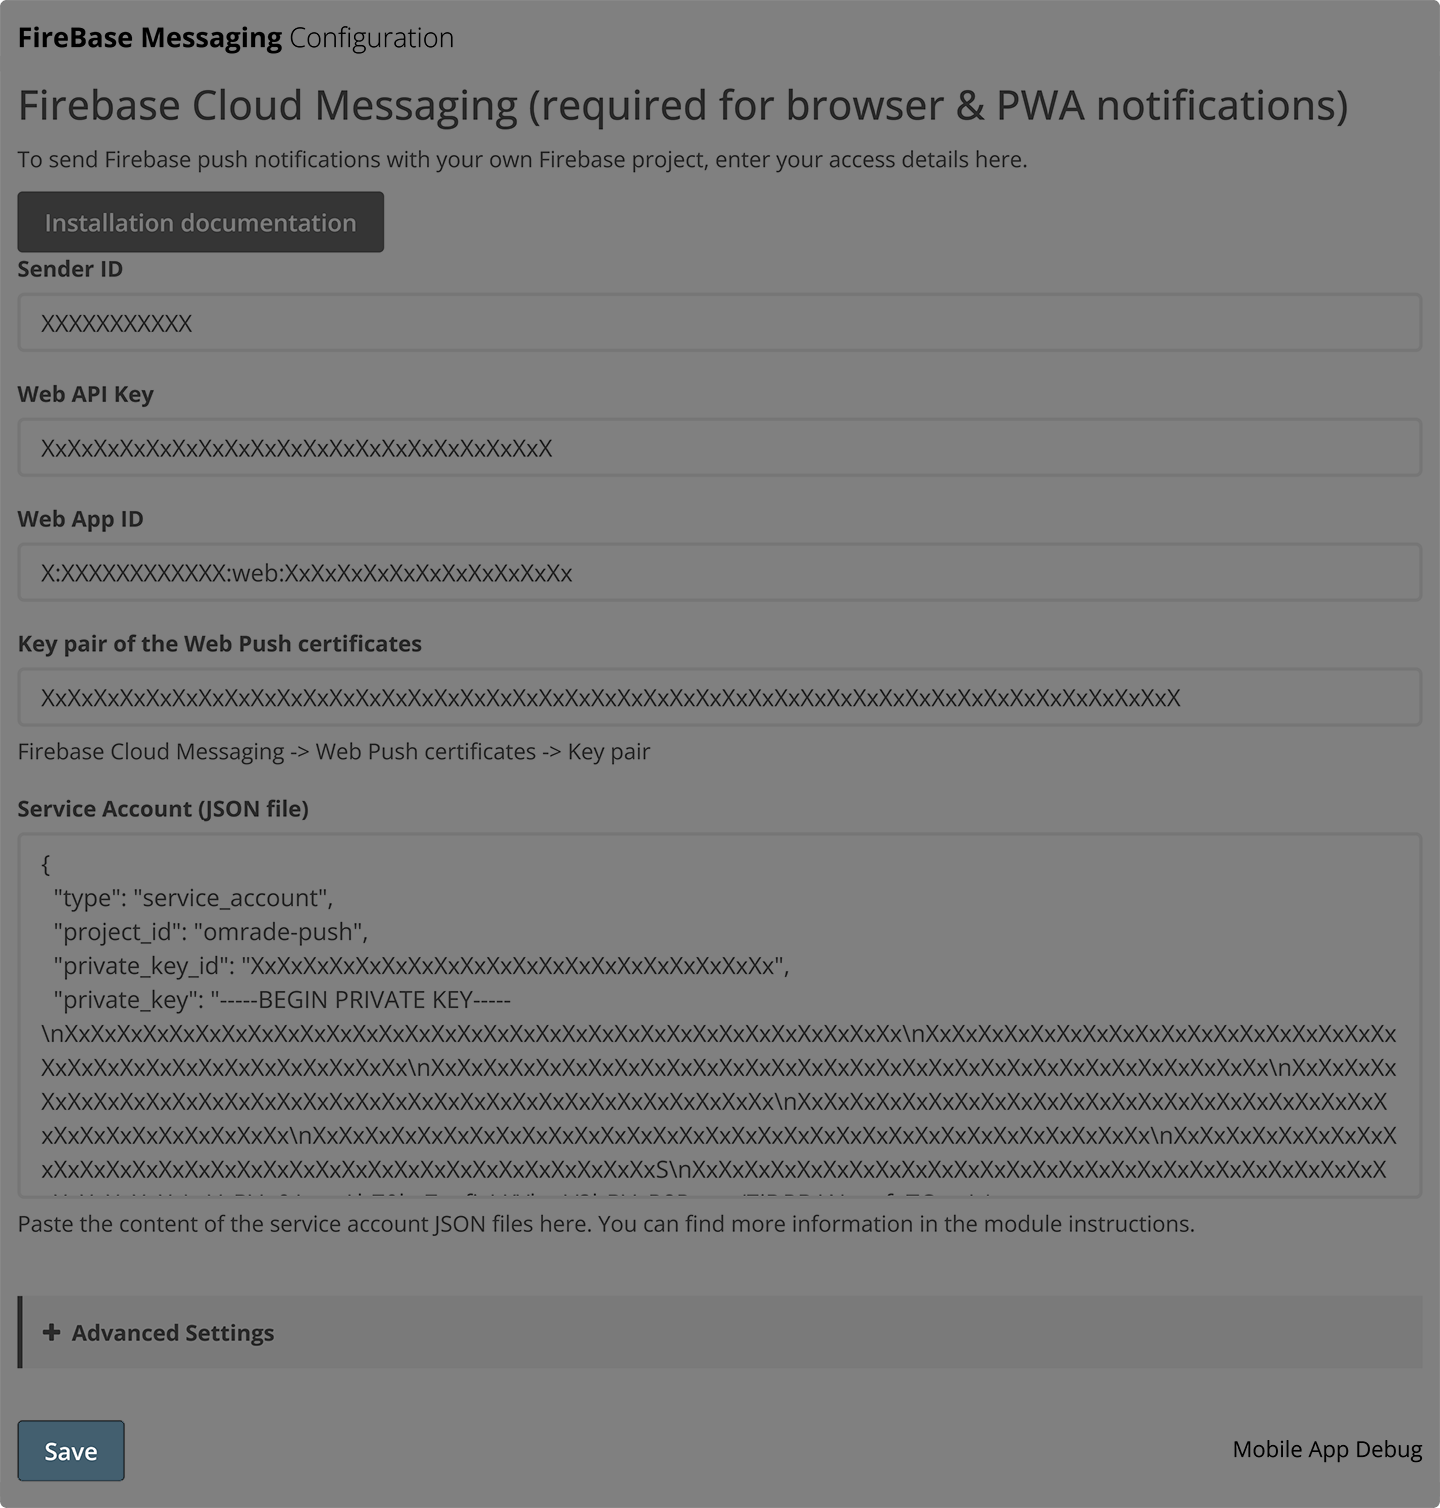
3.3. Copy the highlighted information from your App’s Firebase Configuration and paste it into the Modules Configuration as follows: apiKey = Web API Key, messagingSenderId = Sender ID, and appId = Web App ID.
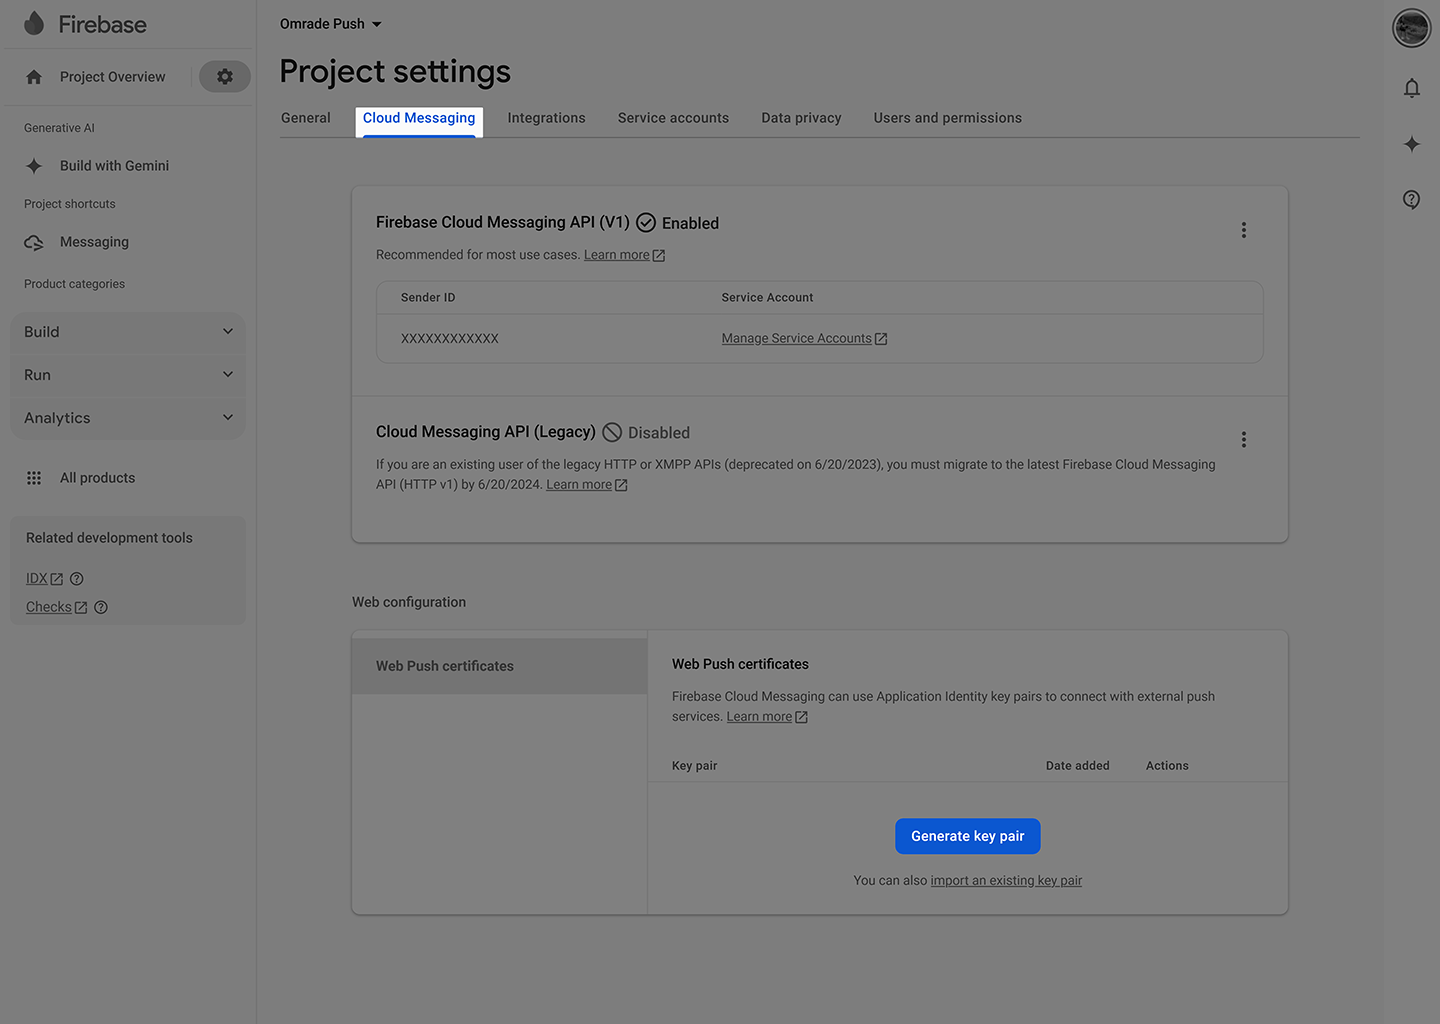
4.1. In the Cloud Messaging tab, select "Generate Key Pair".
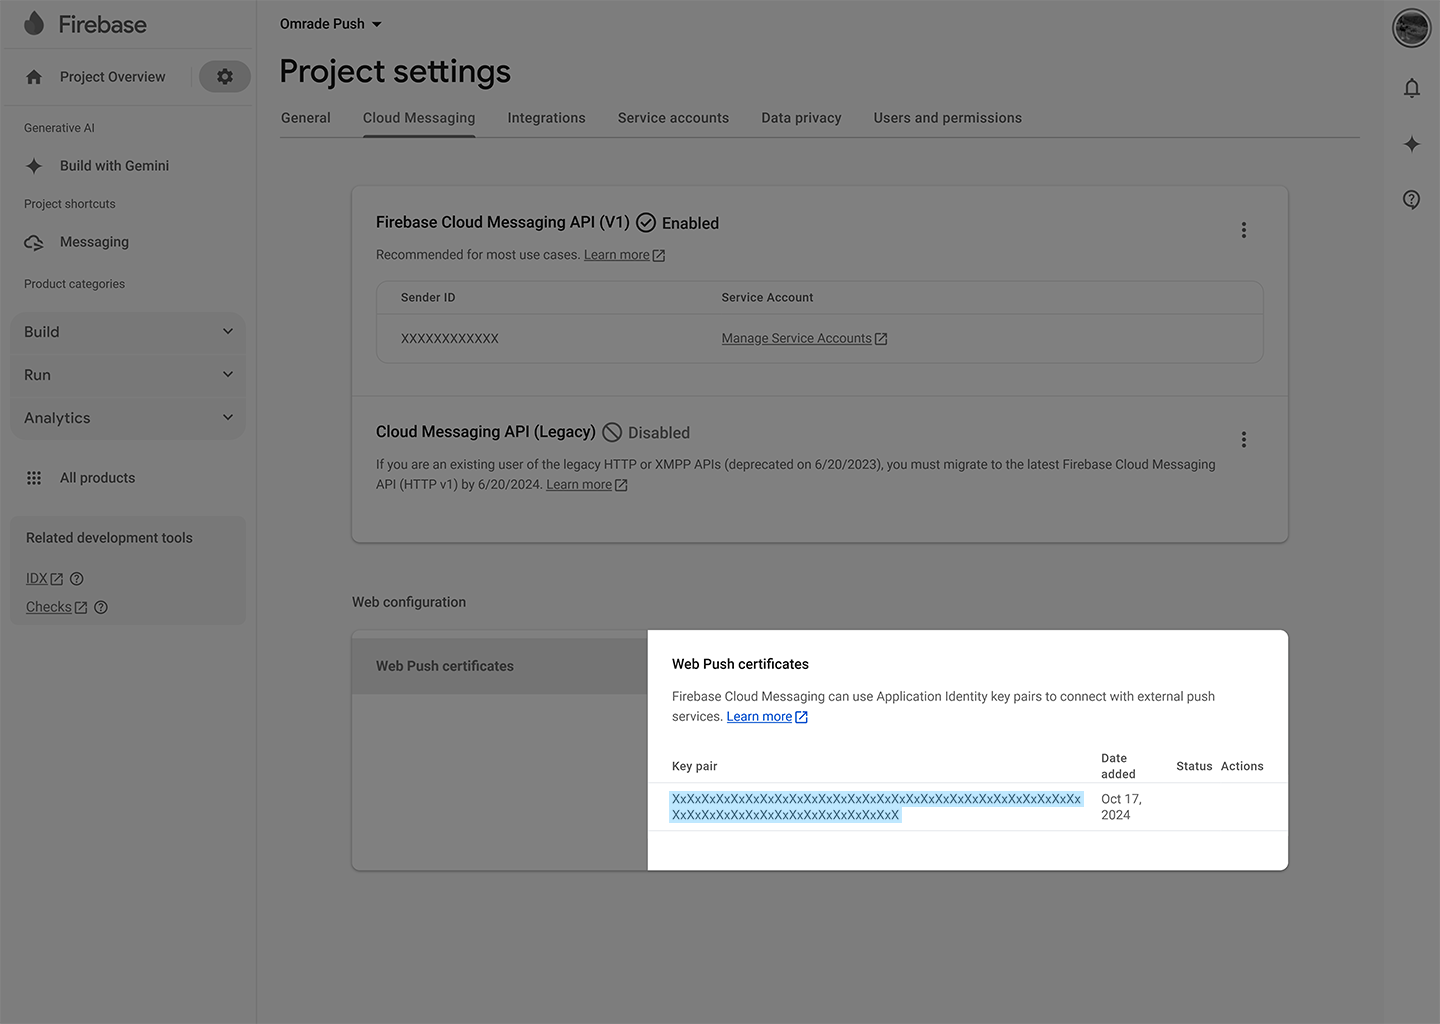
4.2. Copy the highlighted information from your Web Push Certificates and paste it into the Modules Configuration as follows: Key pair = Key Pair from the Web Push certificates
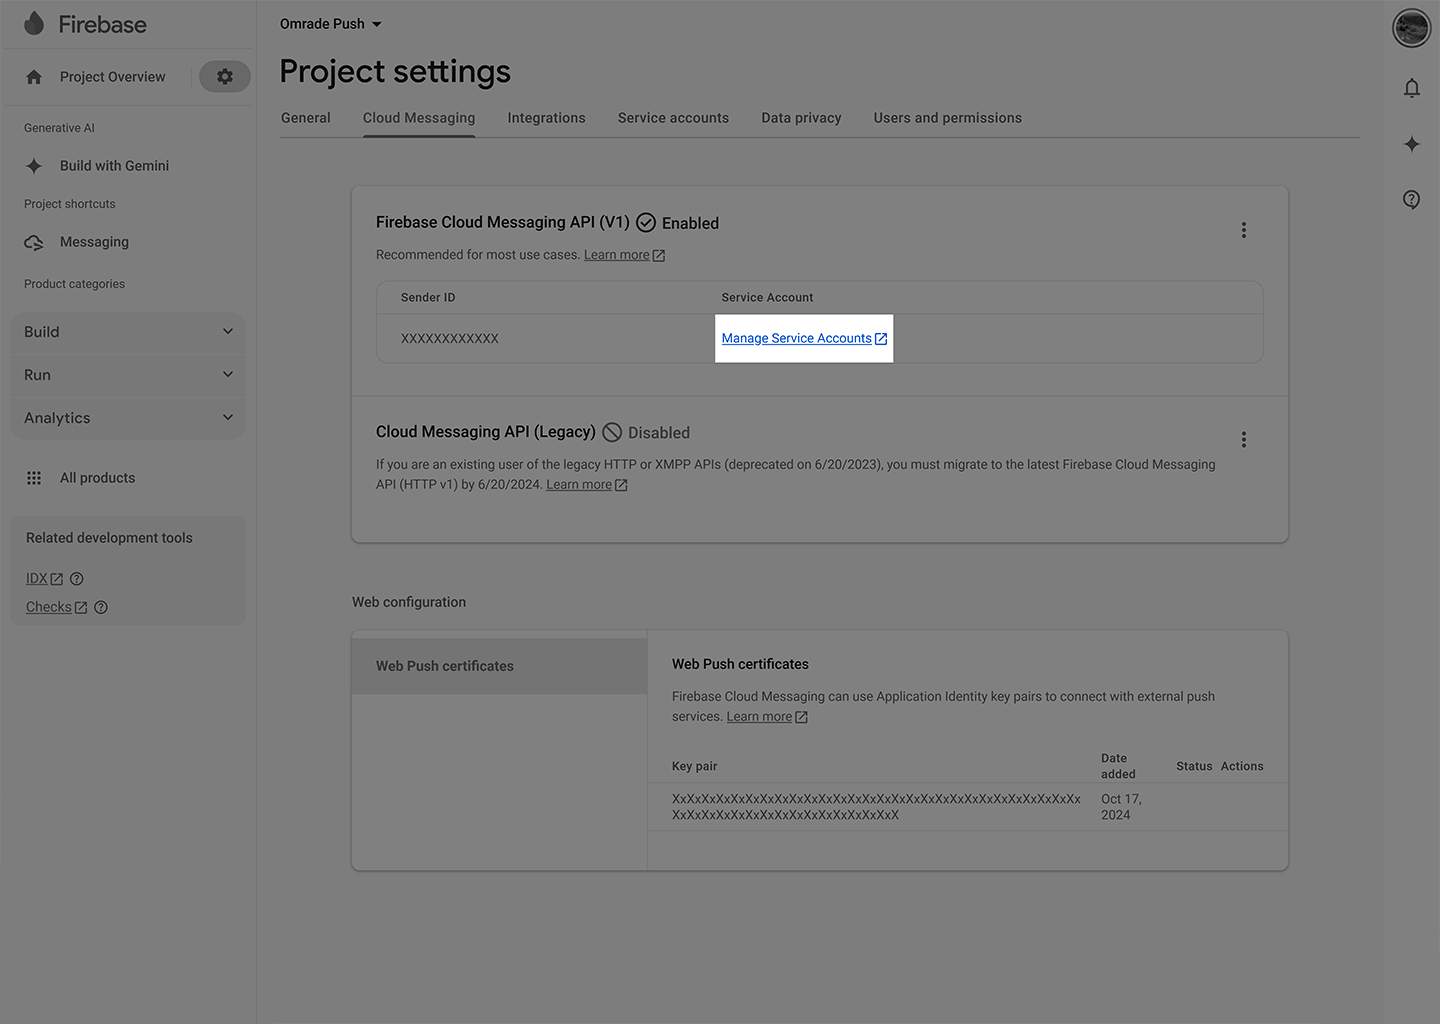
5.1. In the Cloud Messaging tab, under Firebase Cloud Messaging API, click on "Manage Service Accounts".
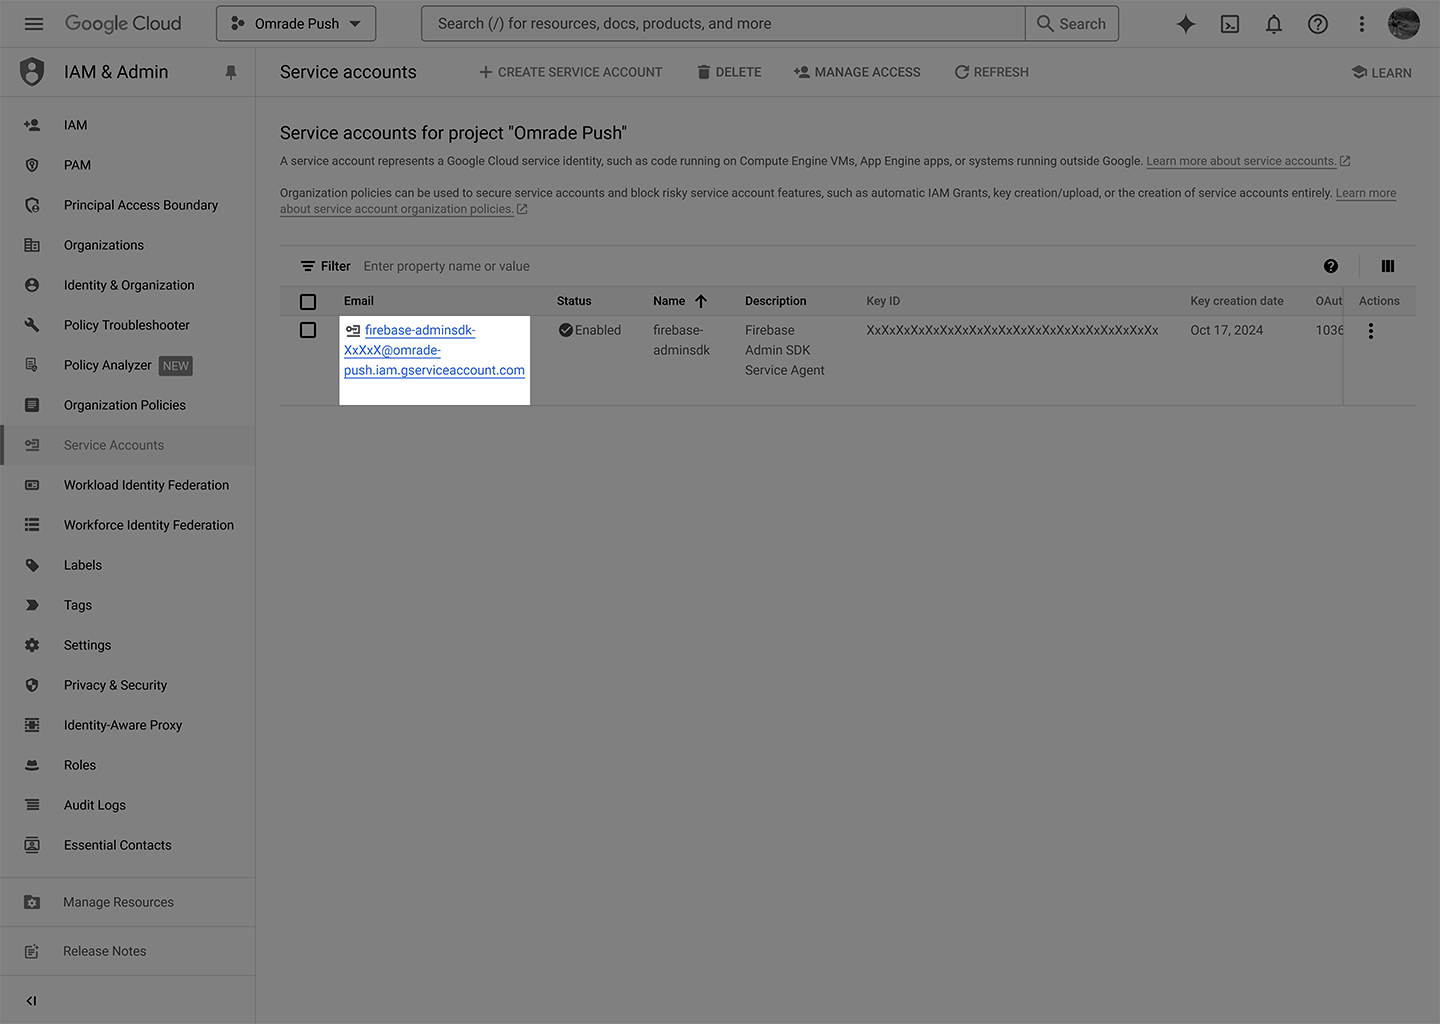
5.2. Under Service Accounts, select your account.
Note: In some instances, it may take longer for Google to generate the account automatically. In rare cases where the account is not generated, please create one by clicking on "Create Service Account".
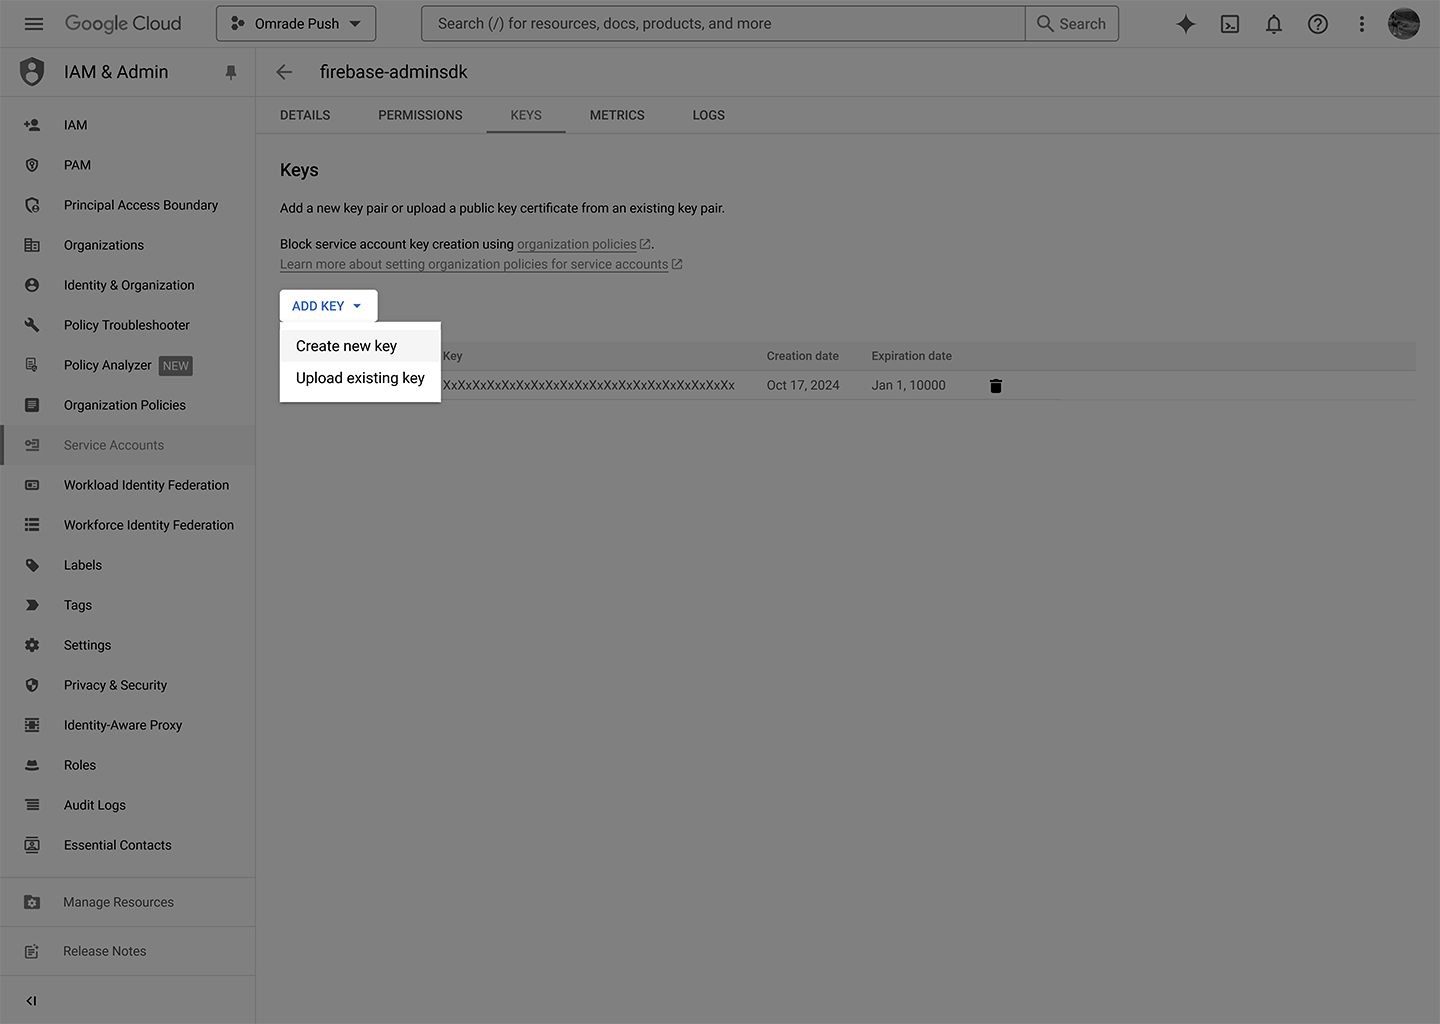
5.3. Switch to the Keys tab and click Create New Key.
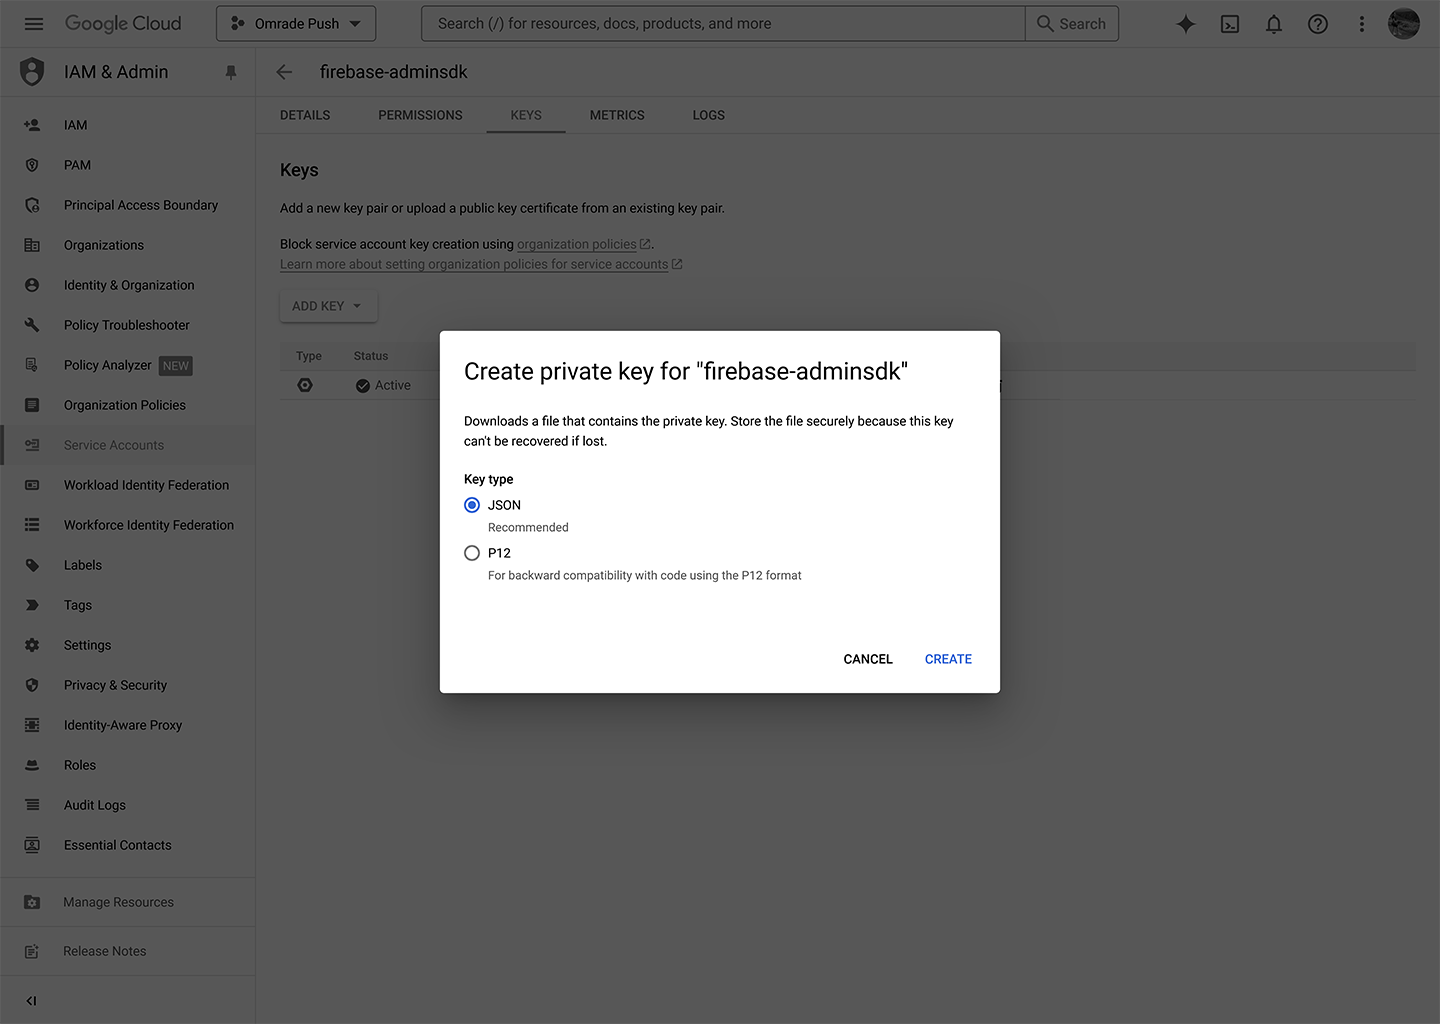
5.4. Choose JSON as the Key type and click Create.
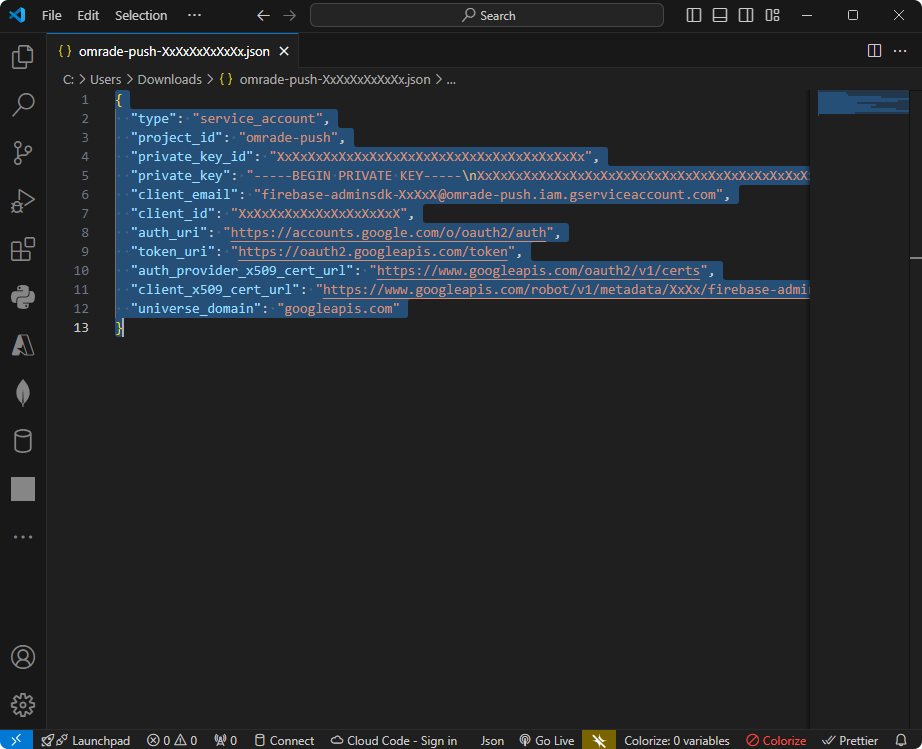
6. Open your Service Account key JSON file, and copy its contents into the Service Account (JSON file) field in the Modules Configuration.
7. When you are finished, click Save on the Modules Configuration page.
Custom CSP Configuration
If you have customized your CSP header, make sure to allow the following URLs:
"script-src" => [
    "self" => true,
    "allow" => [
        "https://www.gstatic.com/firebasejs/10.6.0-20231107192534/firebase-app.js",
        "https://www.gstatic.com/firebasejs/10.6.0-20231107192534/firebase-messaging.js"
    ]
],
 "connect-src" => [
    "self" => true,
    "allow" => [
        "https://fcm.googleapis.com/"
    ]
],